Music Production: A Practical Blueprint for Getting Started
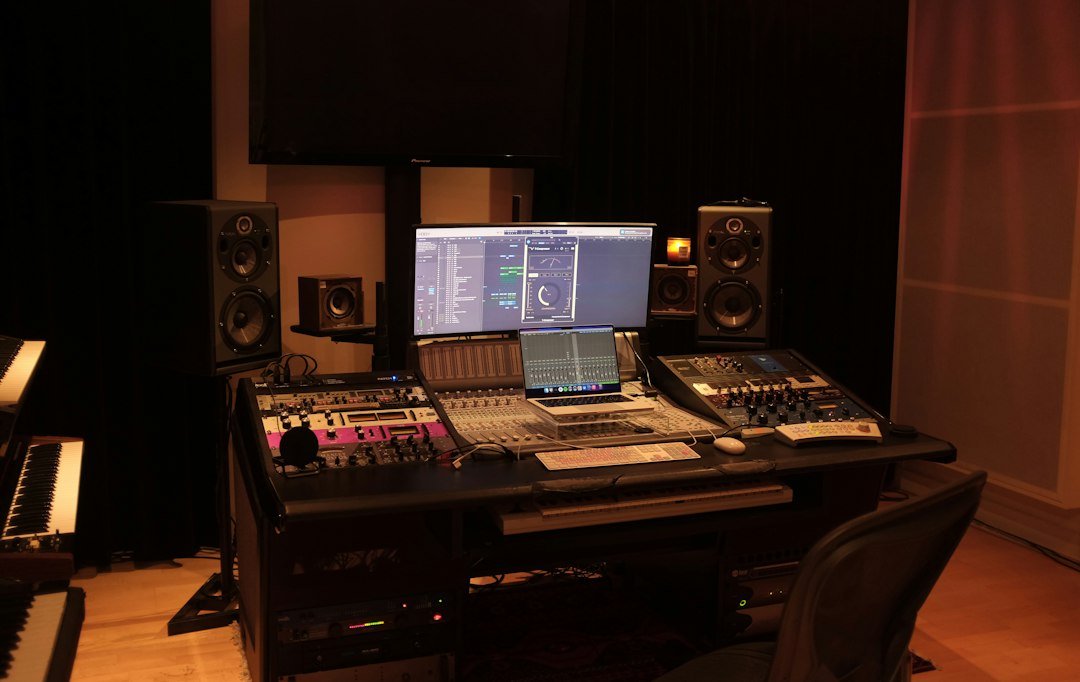
Music production is the complete process of turning a musical idea into a finished recording that can be shared or sold.
Key Takeaways
- Define your goal and budget before buying gear.
- Choose a Digital Audio Workstation (DAW) that matches your workflow.
- Start with a simple monitoring setup; upgrade only when needed.
- Treat each stage – recording, mixing, mastering – as a separate, repeatable step.
- Use cloud‑based collaboration tools like BandLab to get feedback early.

What Exactly Is Music Production?
Music production is the umbrella term for everything that happens from the first spark of an idea to the final audio file ready for distribution. It includes songwriting, arranging, recording, editing, mixing, and mastering. The process can be done in a professional studio or a home setup, as long as the right tools and mindset are in place.
What Role Does a Music Producer Play?
A music producer (or record producer) guides the artistic and technical aspects of a project. According to Berklee Online, a producer handles scheduling, budgeting, shaping the music, supervising performance, and balancing work with creative play. In practice, this means they help an artist translate a vision into a polished track while keeping the project on time and within budget.
How Do I Choose the Right Digital Audio Workstation?
Pick a DAW that fits your operating system, budget, and workflow preferences. Popular options include Ableton Live for loop‑based creation, Logic Pro X for Mac‑only users, and FL Studio for beat‑centric producers. Most DAWs offer a free trial; test a few before committing.
What Basic Gear Do I Need to Start?
MusicTech outlines the essential hardware:
- Computer: A recent CPU, at least 8 GB RAM, and SSD storage.
- Audio Interface: Converts analog signals to digital; a 2‑in/2‑out model like Focusrite Scarlett 2i2 works for most beginners.
- Monitoring: Closed‑back headphones or near‑field speakers for accurate playback.
- MIDI Controller (optional): Enables hands‑on input for virtual instruments.
Invest in these items first; additional gear such as compressors or vocal booths can be added later.
How Should I Structure a Production Session?
Follow a repeatable workflow to stay organized:
- Pre‑Production: Sketch the song structure, tempo, and key.
- Tracking: Record individual parts (drums, bass, vocals, etc.) using the audio interface.
- Editing: Clean up timing, pitch, and unwanted noise.
- Mixing: Balance levels, apply EQ, compression, and effects.
- Mastering: Finalize loudness and ensure the track translates across playback systems.
Document each step in your DAW’s session file to make revisions easier.
Common Mistakes Beginners Make and How to Avoid Them
1. Skipping pre‑production – Without a clear arrangement, tracking can become chaotic. Draft a simple arrangement first.
- Over‑processing – Adding too many plugins can muddy the mix. Start with basic EQ and compression.
- Ignoring gain staging – Keep signal levels in the optimal range to prevent distortion.
- Relying on headphones only – Headphones can mask frequency issues; supplement with speakers when possible.
- Not backing up sessions – Use cloud storage or external drives; losing a session costs hours of work.
How to Collaborate Online Effectively
BandLab offers a cloud‑based DAW where you can share stems, comment in real time, and export mixes directly to streaming platforms. This eliminates the need for sending large files via email and speeds up feedback loops.
When Should I Consider Professional Mastering?
If you plan to release music on major platforms, a professional mastering engineer can ensure loudness compliance and tonal balance. For hobby projects, many DAWs include decent mastering presets that can serve as a temporary solution.
What Are the Costs Involved?
Initial hardware can range from $500 to $1,200 depending on brand and features. DAW licenses vary: a perpetual license for Logic Pro X costs $199, while Ableton Live 11 Standard is $449. Subscription models (e.g., Adobe Audition) add monthly fees. Factor in occasional plugin purchases – many reputable developers offer free or trial versions.
What to Do Next
1. List your budget and choose a DAW that offers a free trial.
- Purchase a basic audio interface and a pair of reliable headphones.
- Set up a simple home studio space and follow the workflow steps above for your first track.
For more ideas on how to analyze your finished track’s performance, check out our playlist analyzer guide that walks through data‑driven tweaks.
Explore AI‑enhanced composition tools on Miuzo if you want to experiment with generated ideas.
Visit our site for additional free utilities that can streamline your workflow.

How Can I Build a Simple Beat From Scratch?
Start with a tempo that fits the style you’re after – 120 BPM works for many pop and hip‑hop tracks. Set the metronome, then lay down a basic drum pattern using a kick on beats 1 and 3 and a snare on 2 and 4. Add a closed hi‑hat on every eighth note to give the groove some motion.
Step‑by‑step workflow
- Choose a drum kit. In your DAW’s browser, pick a kit that matches the genre (e.g., acoustic kit for rock, 808‑style kit for trap).
- Program the kick. Draw four notes in a 4‑bar loop, placing them on the downbeats. Listen for any unwanted clicks and enable a short fade‑in if needed.
- Add the snare. Place hits on the second and fourth beats. If the snare feels thin, layer a second snare sample with a subtle reverb.
- Layer the hi‑hat. Use the piano roll to insert 16th‑note hits. For a more natural feel, vary the velocity of every other hit.
- Quantize lightly. Apply a 1/64 swing or a 2‑point offset to avoid a robotic feel.
Once the drum loop sounds solid, duplicate it for the whole section and mute the pattern where you want a break. This creates a simple arrangement without any extra plugins.
Common pitfalls and how to fix them
- Over‑compressing the drums. Heavy compression can flatten the dynamics, making the beat sound lifeless. Use a ratio around 2:1 and a fast attack to preserve the punch.
- Clashing frequencies. If the kick and bass occupy the same low range, they’ll muddy each other. Apply a high‑pass filter to the bass at ~40 Hz to give the kick room.
- Static hi‑hat pattern. Repeating the same 16th‑note sequence can become boring. Introduce an open hi‑hat or a subtle syncopated accent every 2‑4 bars.
What Are Effective Ways to Mix a Small Home Studio Track?
Mixing is about balancing elements so each part is heard clearly. In a small room, low‑frequency buildup is a frequent issue, so start by treating the space and then move to the mix.
Room treatment basics
- Place broadband absorbers at the first reflection points on the side walls.
- Use a bass trap in the corner where the two side walls meet the back wall.
- Keep monitors at ear height and form an equilateral triangle with your listening position.
After the acoustic fixes, follow this mixing checklist:
Mix checklist for beginners
- Gain staging. Set each track’s fader so the combined mix peaks around -6 dBFS. This leaves headroom for processing.
- High‑pass everything but the bass. Apply a gentle 80‑100 Hz high‑pass to vocals, guitars, and synths to reduce low‑end clutter.
- Balance the core elements. Bring the kick, snare, bass, and lead vocal to a level where they dominate the mix without clipping.
- Use panning for space. Place drums and bass near the center, pan guitars left/right, and keep the vocal centered.
- Add subtle reverb. Choose a short plate or room reverb with a decay under 1.5 seconds; send only the vocal and a few melodic elements.
- Compress the bus. Light bus compression (ratio 1.5:1, threshold set so gain reduction is 1‑2 dB) can glue the mix together.
Typical mistakes to watch for
- Too much reverb. A wet vocal can disappear in a small room. Keep the reverb return low and check the mix on headphones as well.
- Ignoring phase. When layering multiple microphones on a drum kit, flip the phase on one track if the combined sound thins out.
- Relying on visual meters alone. Trust your ears; a track that looks balanced on the meter can still be harsh or muffled.
How Do I Decide Between Free and Paid Plugins for My First Projects?
Free plugins can cover most basics, but paid options often provide deeper control and higher quality algorithms. The decision hinges on three factors: budget, sonic goals, and workflow preferences.
When a free plugin is enough
- You’re learning core concepts like EQ, compression, and reverb. Many free tools (e.g., TDR Nova, Voxengo Span) are educationally solid.
- Your genre doesn’t demand ultra‑high‑end processing – lo‑fi hip‑hop, indie folk, or bedroom pop sound great with modest tools.
- You need a quick solution for a one‑off project and don’t want to manage license renewals.
Scenarios where a paid plugin pays off
- Professional clients expect polished results; premium EQs (e.g., FabFilter Pro‑Q) offer surgical precision and intuitive visual feedback.
- You work with complex vocal chains; a dedicated multiband compressor can save hours compared to stacking several free units.
- Latency is critical for live‑instrument recording; low‑latency plugins from reputable developers can reduce monitoring delay.
Practical decision rule
If your current free chain produces a mix that translates well on multiple speakers, stick with it. If you notice recurring limitations – such as harshness that a simple free EQ can’t tame – budget for a single high‑quality plugin that addresses that gap before expanding further.
Quick comparison table
| Aspect | Free Plugins | Paid Plugins |
|---|---|---|
| Cost | Zero | Typically $30‑$200 per plugin |
| Feature depth | Basic controls | Advanced modulation, side‑chain, visual analytics |
| Support & updates | Community forums | Dedicated support, regular updates |
| CPU efficiency | Varies, often lightweight | Optimized, but sometimes heavier |
Start with a small free suite, evaluate the sound, then allocate a modest budget for the one or two tools that truly lift your productions.
What Practical Steps Can I Take Today to Improve My Production Skills?
Pick a single habit and stick to it for a week; consistency beats occasional marathon sessions.
1. Daily ear‑training drill
- Spend 10 minutes identifying the frequency range of a random instrument in a song. Use a parametric EQ to boost and cut until you hear the change.
- Log the instrument and the frequency you found. Over time you’ll build a mental map of where each element lives.
2. Re‑create a reference track
- Choose a song you admire.
- Match its tempo, then program a basic drum pattern that mimics the groove.
- Focus on one element – like the bass line – and try to replicate its rhythm and tone using only stock synths.
- Compare your version with the original and note differences in tone, timing, and dynamics.
3. Limit your plugin palette
- Pick one EQ, one compressor, and one reverb. Work a whole track using only those three.
- This forces you to learn each tool’s nuances rather than hopping between many presets.
After a week, review the results. You’ll see measurable progress and have concrete ideas for the next step.
Frequently Asked Questions
Do I need a powerful computer to start music production?
A modern laptop with at least an i5 processor, 8 GB RAM, and an SSD can run most DAWs comfortably. Upgrade only if you plan to use many high‑track count projects or resource‑heavy plugins.
Can I produce professional‑quality tracks using only free software?
Yes. Free DAWs like Cakewalk or BandLab provide full recording, mixing, and mastering capabilities. The limiting factor is often the quality of your hardware, not the software.
How long does it take to finish a song from start to finish?
Time varies widely. A simple beat can be completed in a few hours, while a fully arranged song with live instruments may take weeks. Stick to a realistic schedule and break the project into the five workflow stages.